Tabellum for desktop · Chapter 2
Connections
A connection is the address of one database and how to log in to it. Tabellum keeps as many as you like and can have several open at once.
2.1 Adding a connection#
- Click + next to CONNECTIONS in the sidebar.
- Pick the Driver 1: PostgreSQL, MySQL / MariaDB, SQL Server, BigQuery, SQLite or MongoDB.
- Fill in the host, port, database, user and password.
- Click Test 4. When the test passes, click Save.
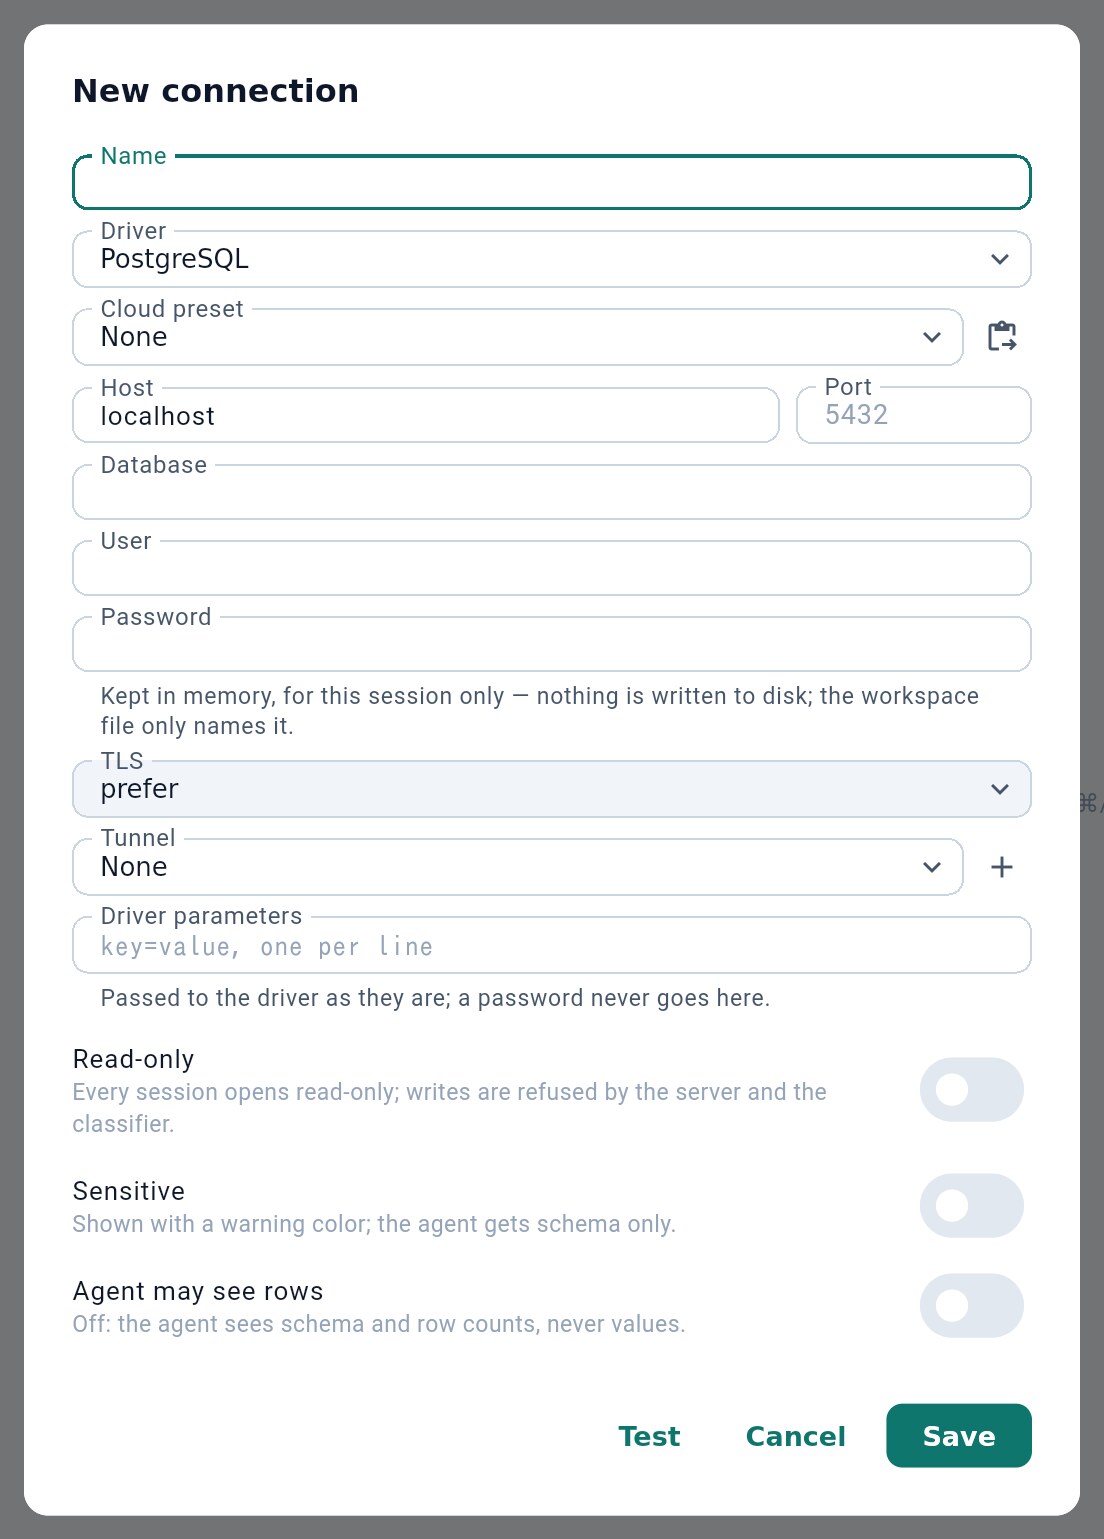
- The database type
- Fill the form from a connection string
- Refuse every write on this connection
- Try the connection before saving
Three switches decide what may happen on the connection:
- Read-only 3: every session opens read-only. The server refuses writes, and Tabellum refuses them before they reach it.
- Sensitive: the connection is drawn in a warning color, and the AI agent gets only its schema.
- Agent may see rows: off by default. While it is off, the agent sees tables, columns and row counts, never values.
2.2 Cloud databases#
For a hosted database, pick its provider under Cloud preset 1. The preset fills in the port, TLS mode and driver settings the provider needs and explains what is special about it 2 — for example, that a transaction pooler has no prepared statements.
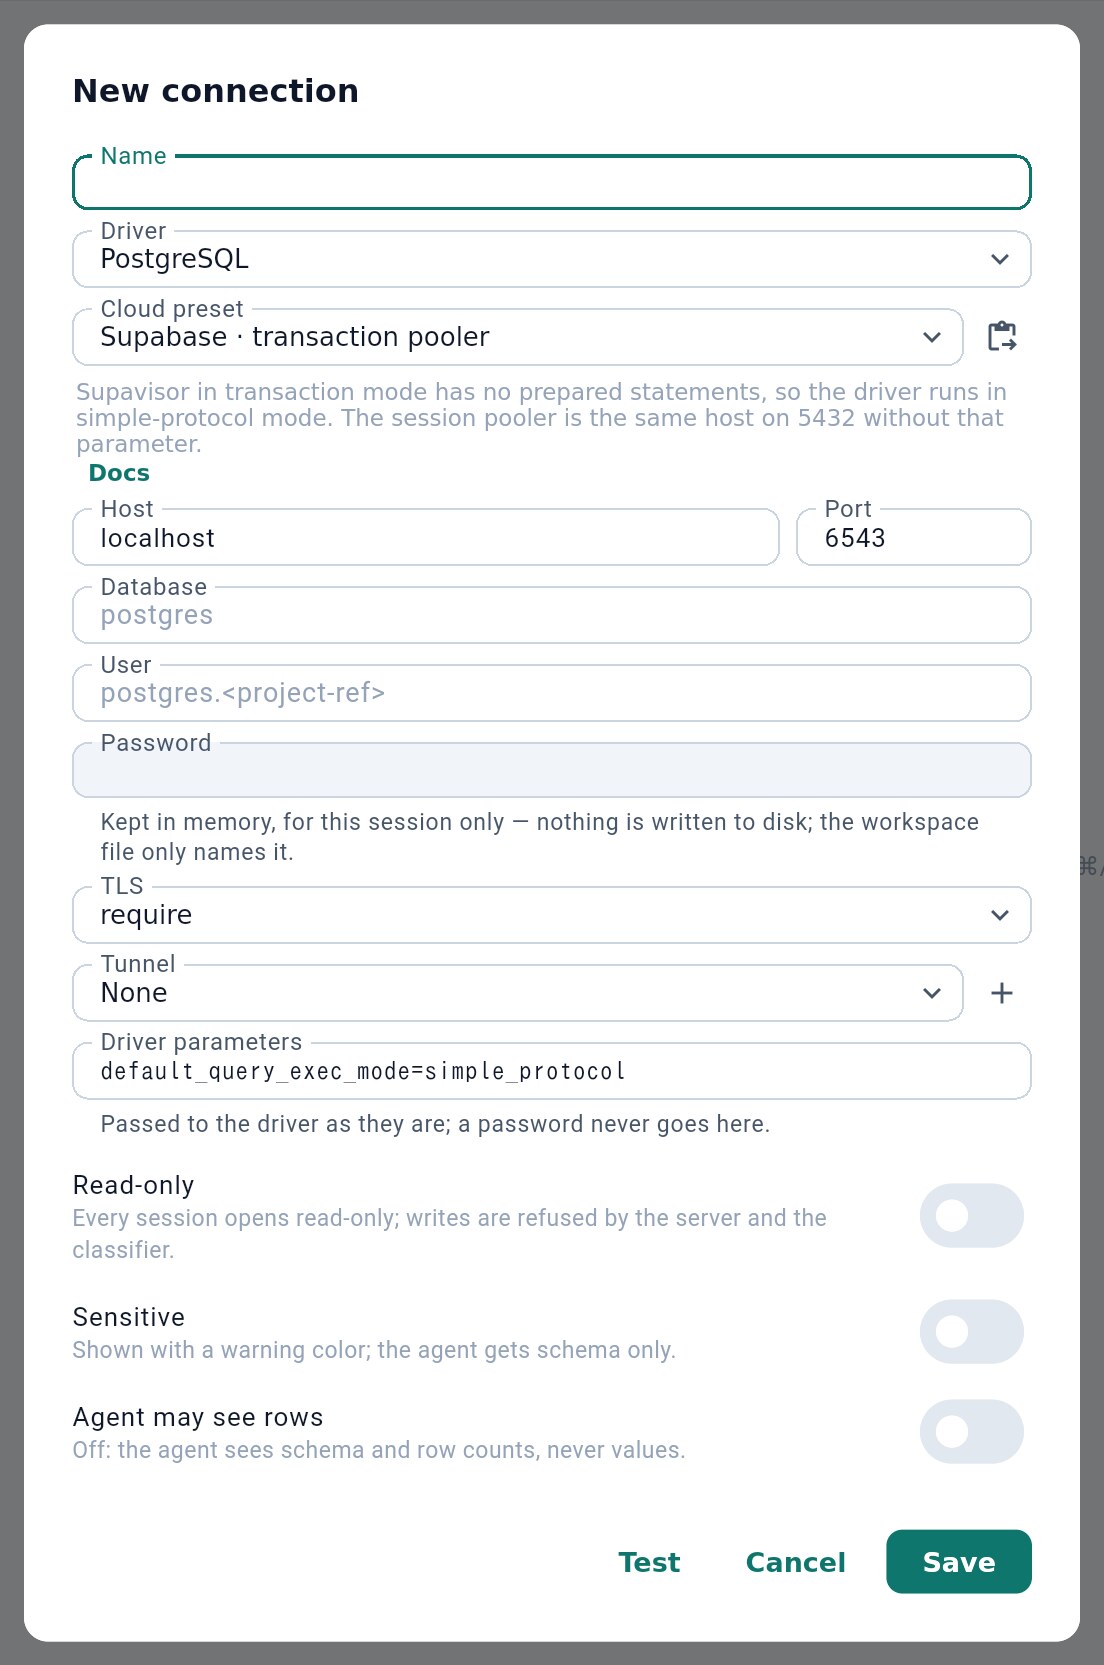
- A cloud provider's settings
- What the provider needs
2.3 Pasting a connection string#
If you have a connection string (postgres://…, mysql://…, mongodb+srv://…, a JDBC URL), click the clipboard button 2 in the first picture and paste it. Tabellum fills in the form, puts the password into the keychain and lists what it set and what it could not 1.
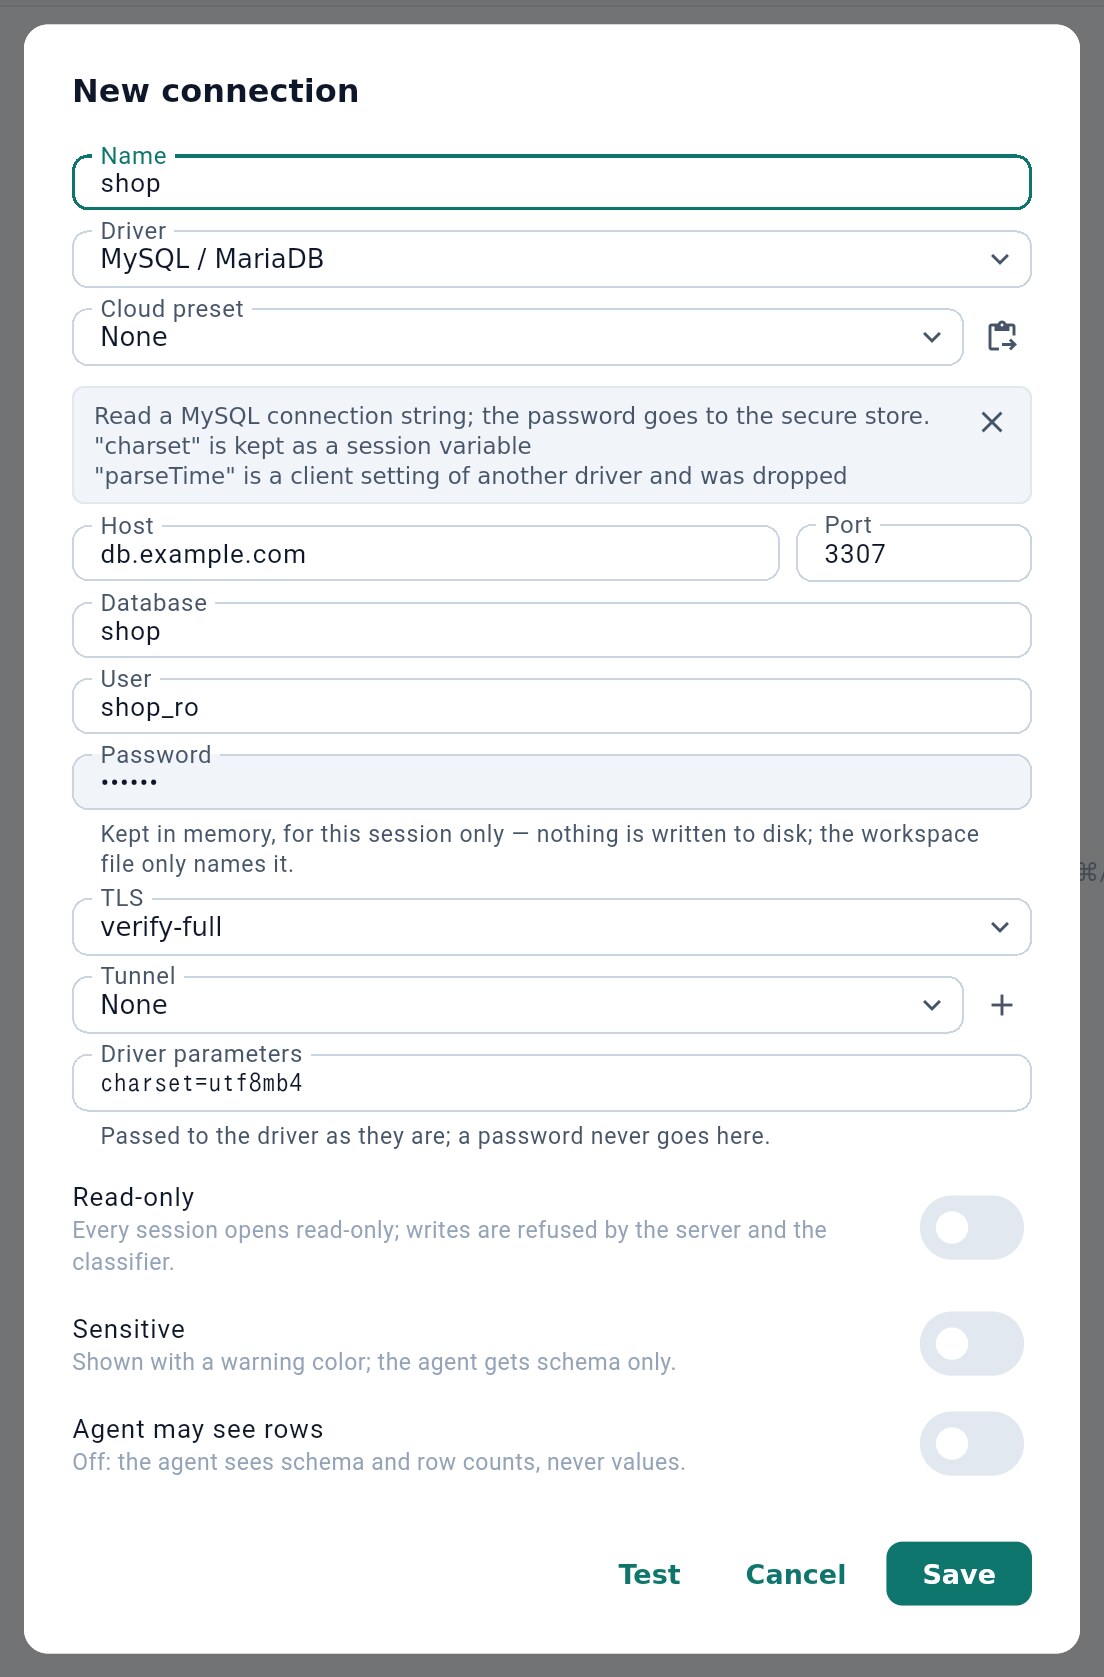
- What the string set, and what it could not
2.4 SQLite files#
An SQLite database is a file, so its connection has no host or login. Browse… 2 picks an existing file and New… 3 creates an empty one. On the Mac App Store version a picked file is copied into the workspace’s sqlite/ folder, because the app may only keep access to its own folder.
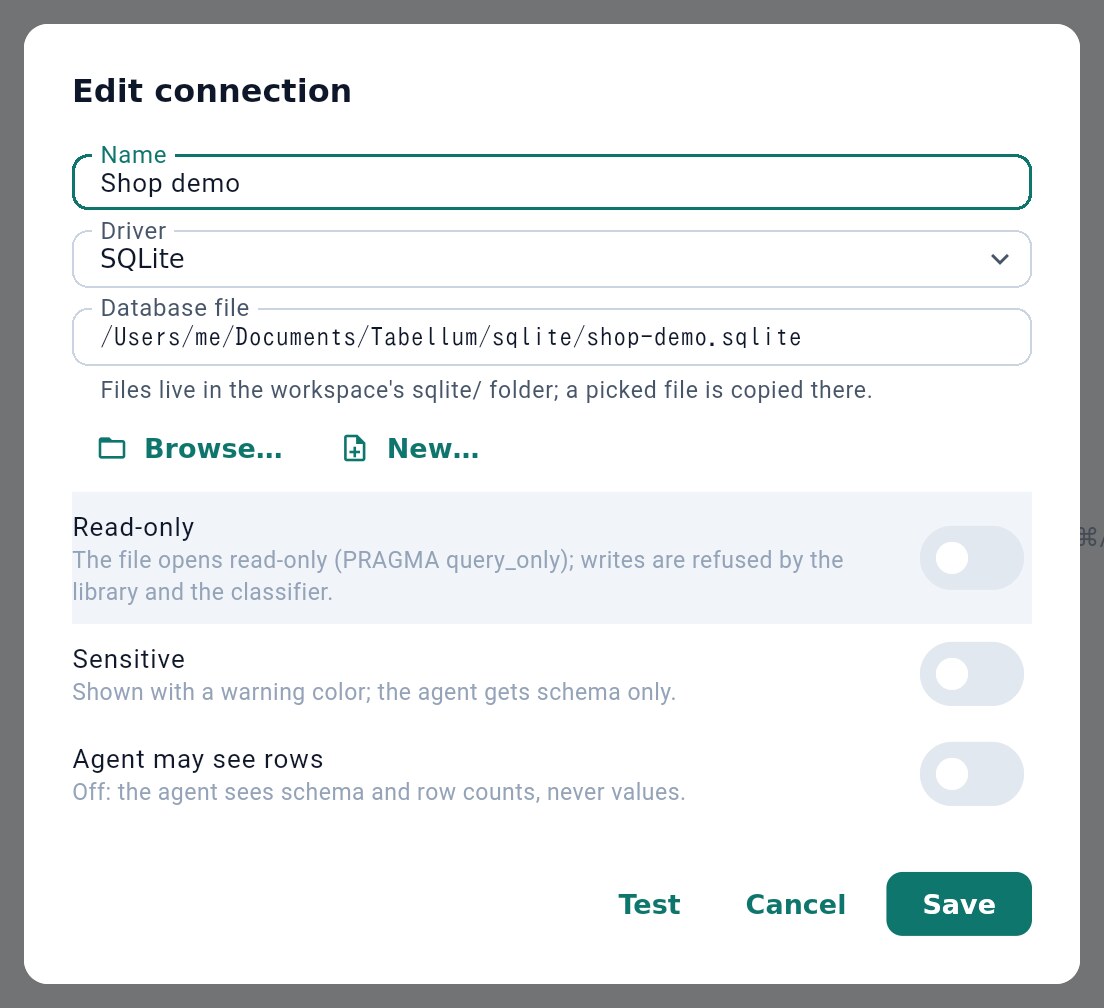
- The database file
- Pick an existing file
- Create a new database file
2.5 Editing a connection#
Each connection in the sidebar has a pencil button, Edit, that opens the same form. The other buttons on the row refresh the schema and connect or disconnect. A connection that cannot connect shows one line saying what failed and what to check — a refused port, a timeout, a wrong password or a TLS problem. Copy details copies the full message.
After the computer sleeps, Tabellum reconnects the open connections by itself. A read that failed because the connection dropped is retried once; anything else offers Run again.
2.6 SSH and WireGuard tunnels#
When a database is only reachable through a server or a VPN, add a tunnel and choose it in the connection’s Tunnel field.
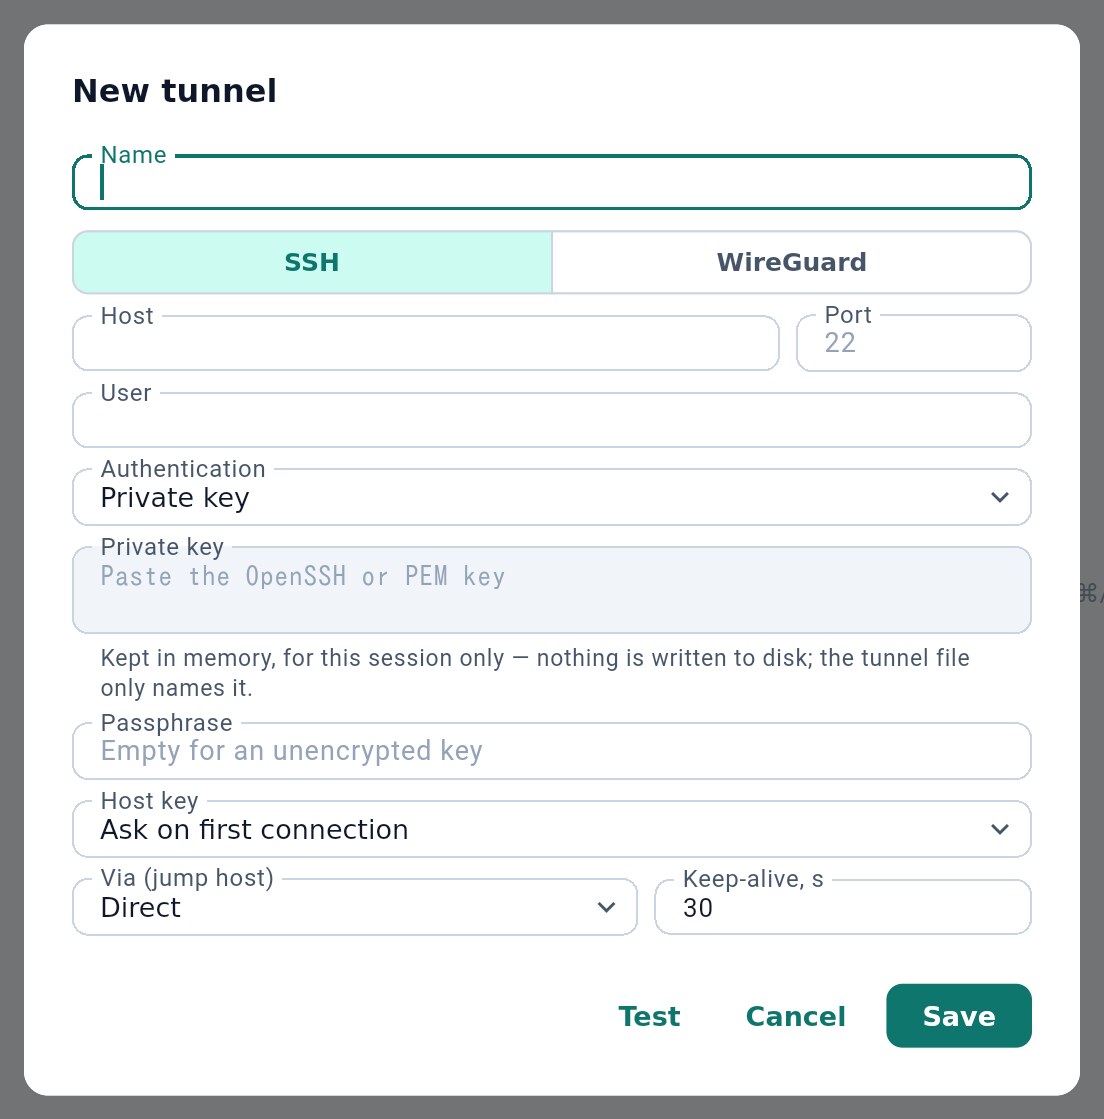
- SSH, or a WireGuard peer
- How the server's key is checked
- Reach it through another tunnel
- SSH 1 logs in with a private key (and its passphrase) or a password. WireGuard connects as a peer; paste a
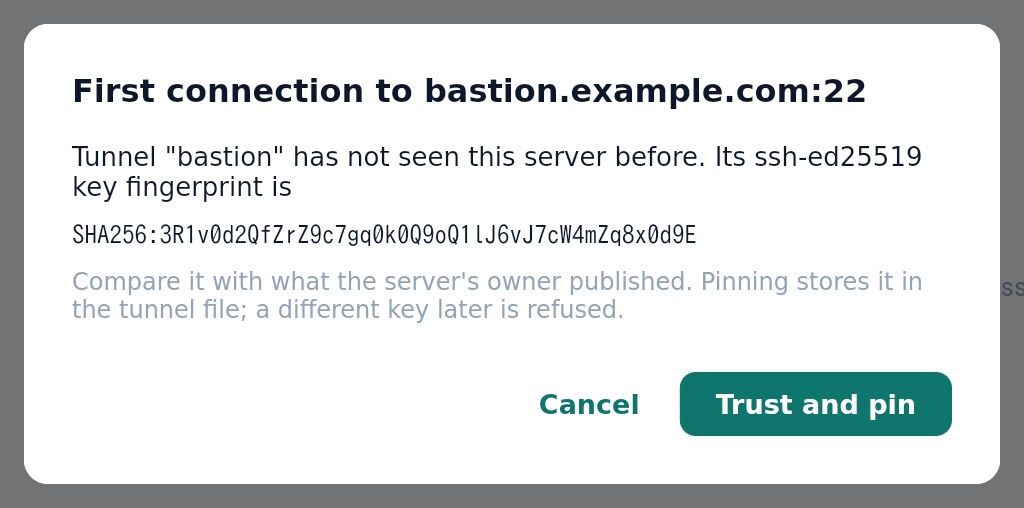
wg-quickconfiguration and the fields are filled in. Neither needs a system VPN or administrator rights. - Host key 2 decides how the server’s key is checked. With Ask on first connection, Tabellum shows the key’s fingerprint the first time and remembers it.
- Via (jump host) 3 reaches the server through another tunnel.
2.7 Sharing connections#
Connections and tunnels move to another window or device with a code. Choose Share connections… in the Tabellum menu (⋯ at the foot of the sidebar, the File menu on a Mac) or the command palette, or Share… in a connection’s menu or in Tunnels….
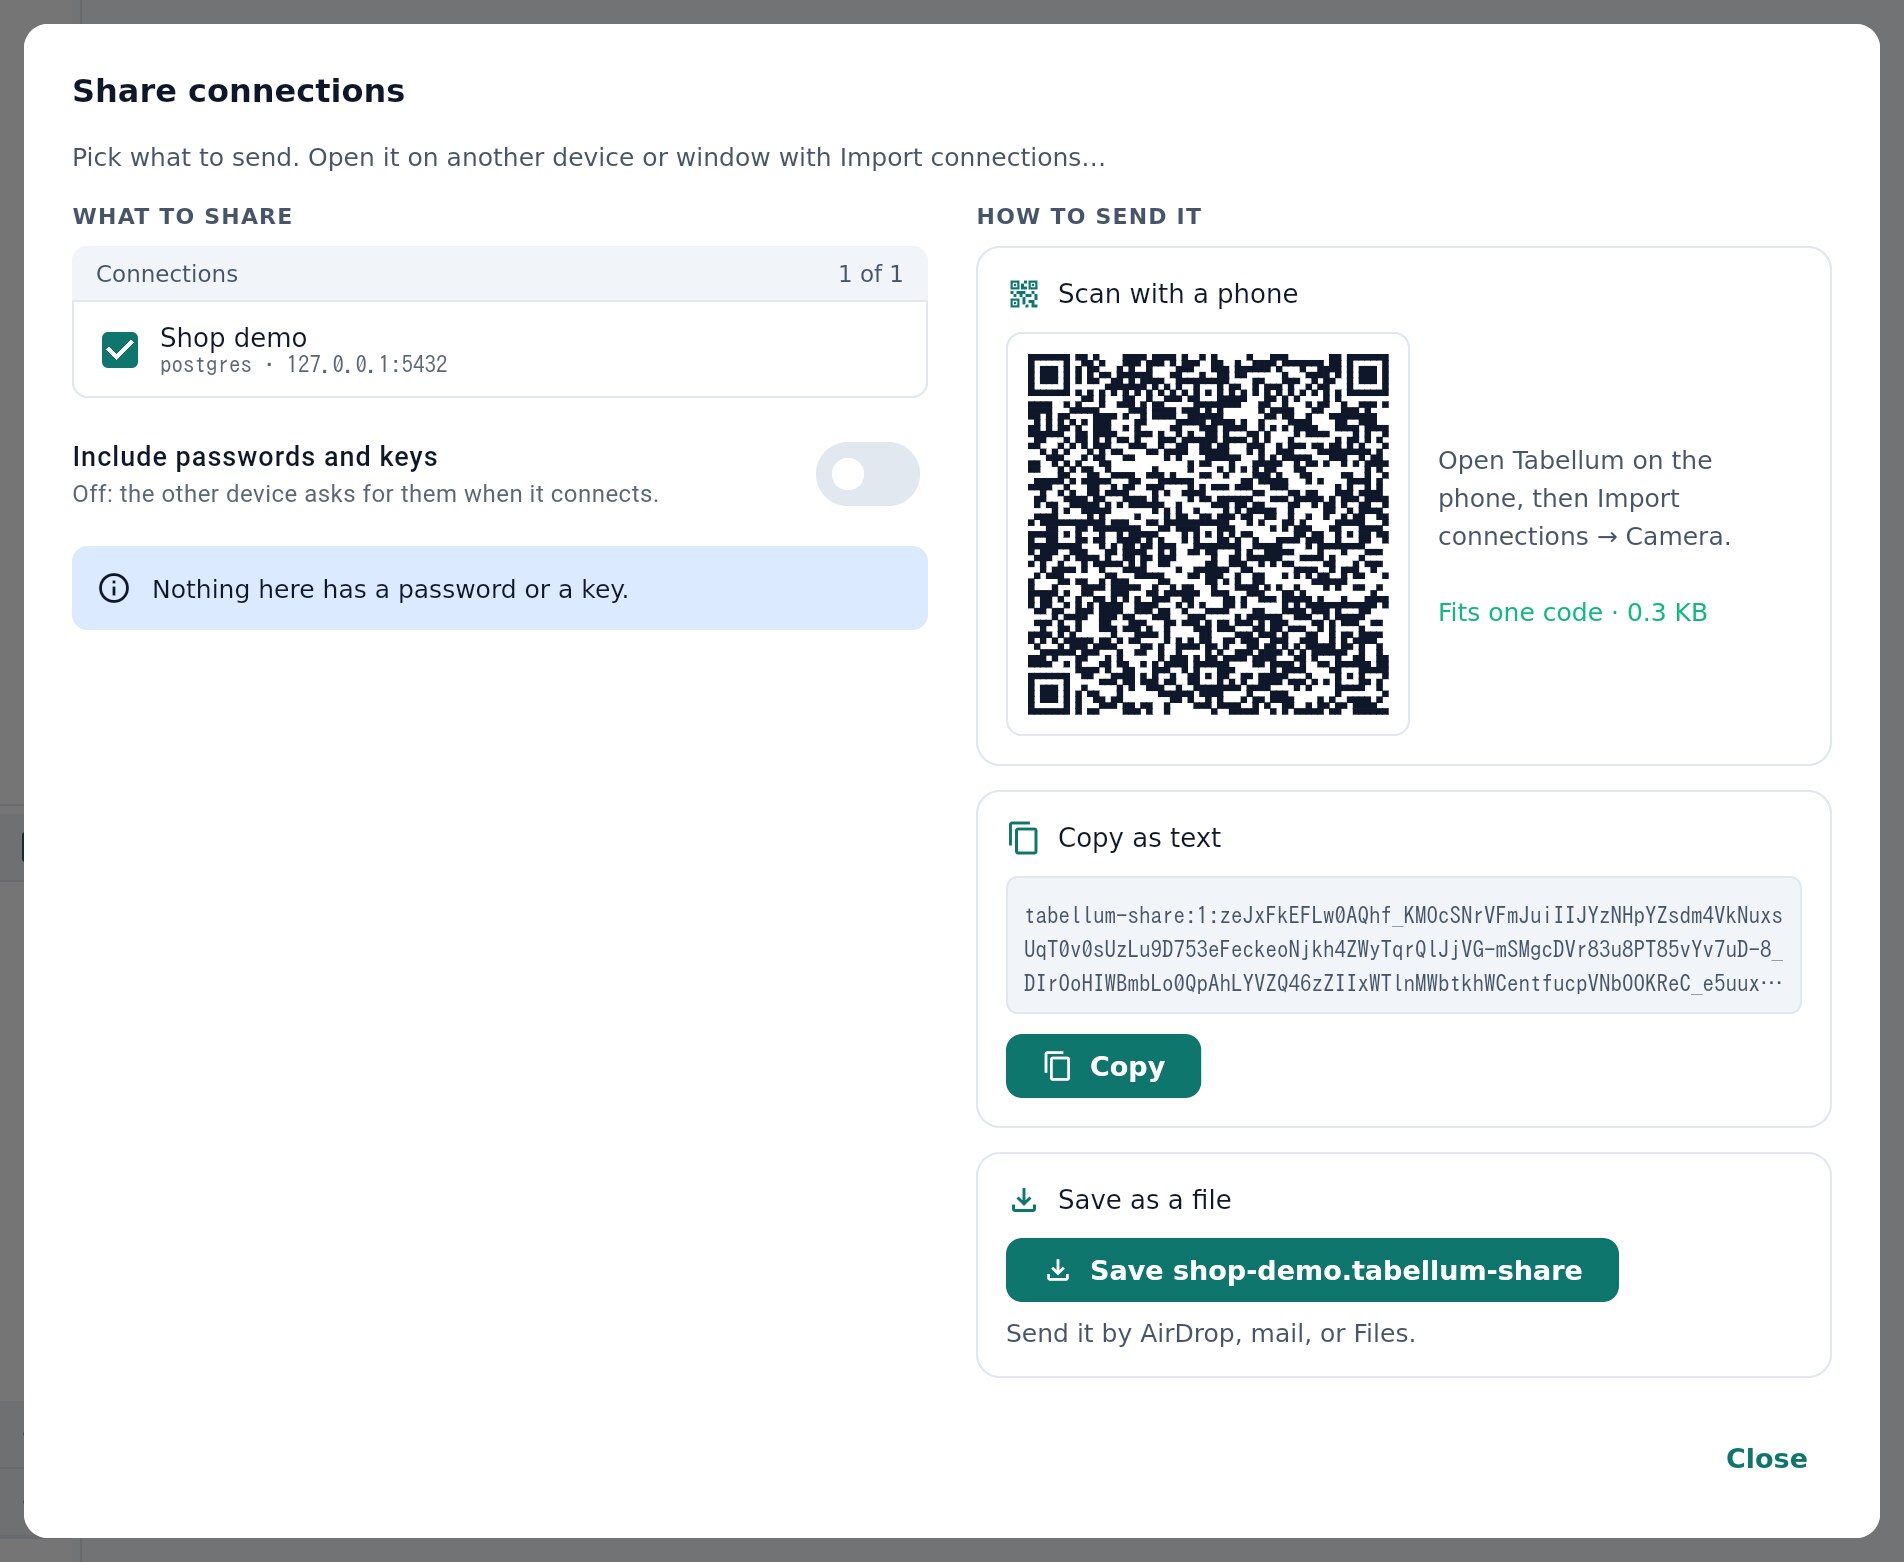
- Pick the connections; their tunnels come along
- Passwords and keys, encrypted, only if you ask
- A QR code for a phone's camera
- The same code as text
- Or saved as a file
Tick what to send 1 a connection’s tunnel comes along by itself. Then send it whichever way suits: scan the QR code 3 with a phone, copy it as text 4 into another window, or save it as a file 5 and send it by mail or AirDrop.
Passwords and keys stay on this computer unless you turn on Include passwords and keys 2. Then you type a passphrase twice, at least 6 characters, and the code carries them encrypted with it.
On the other side, choose Import connections….
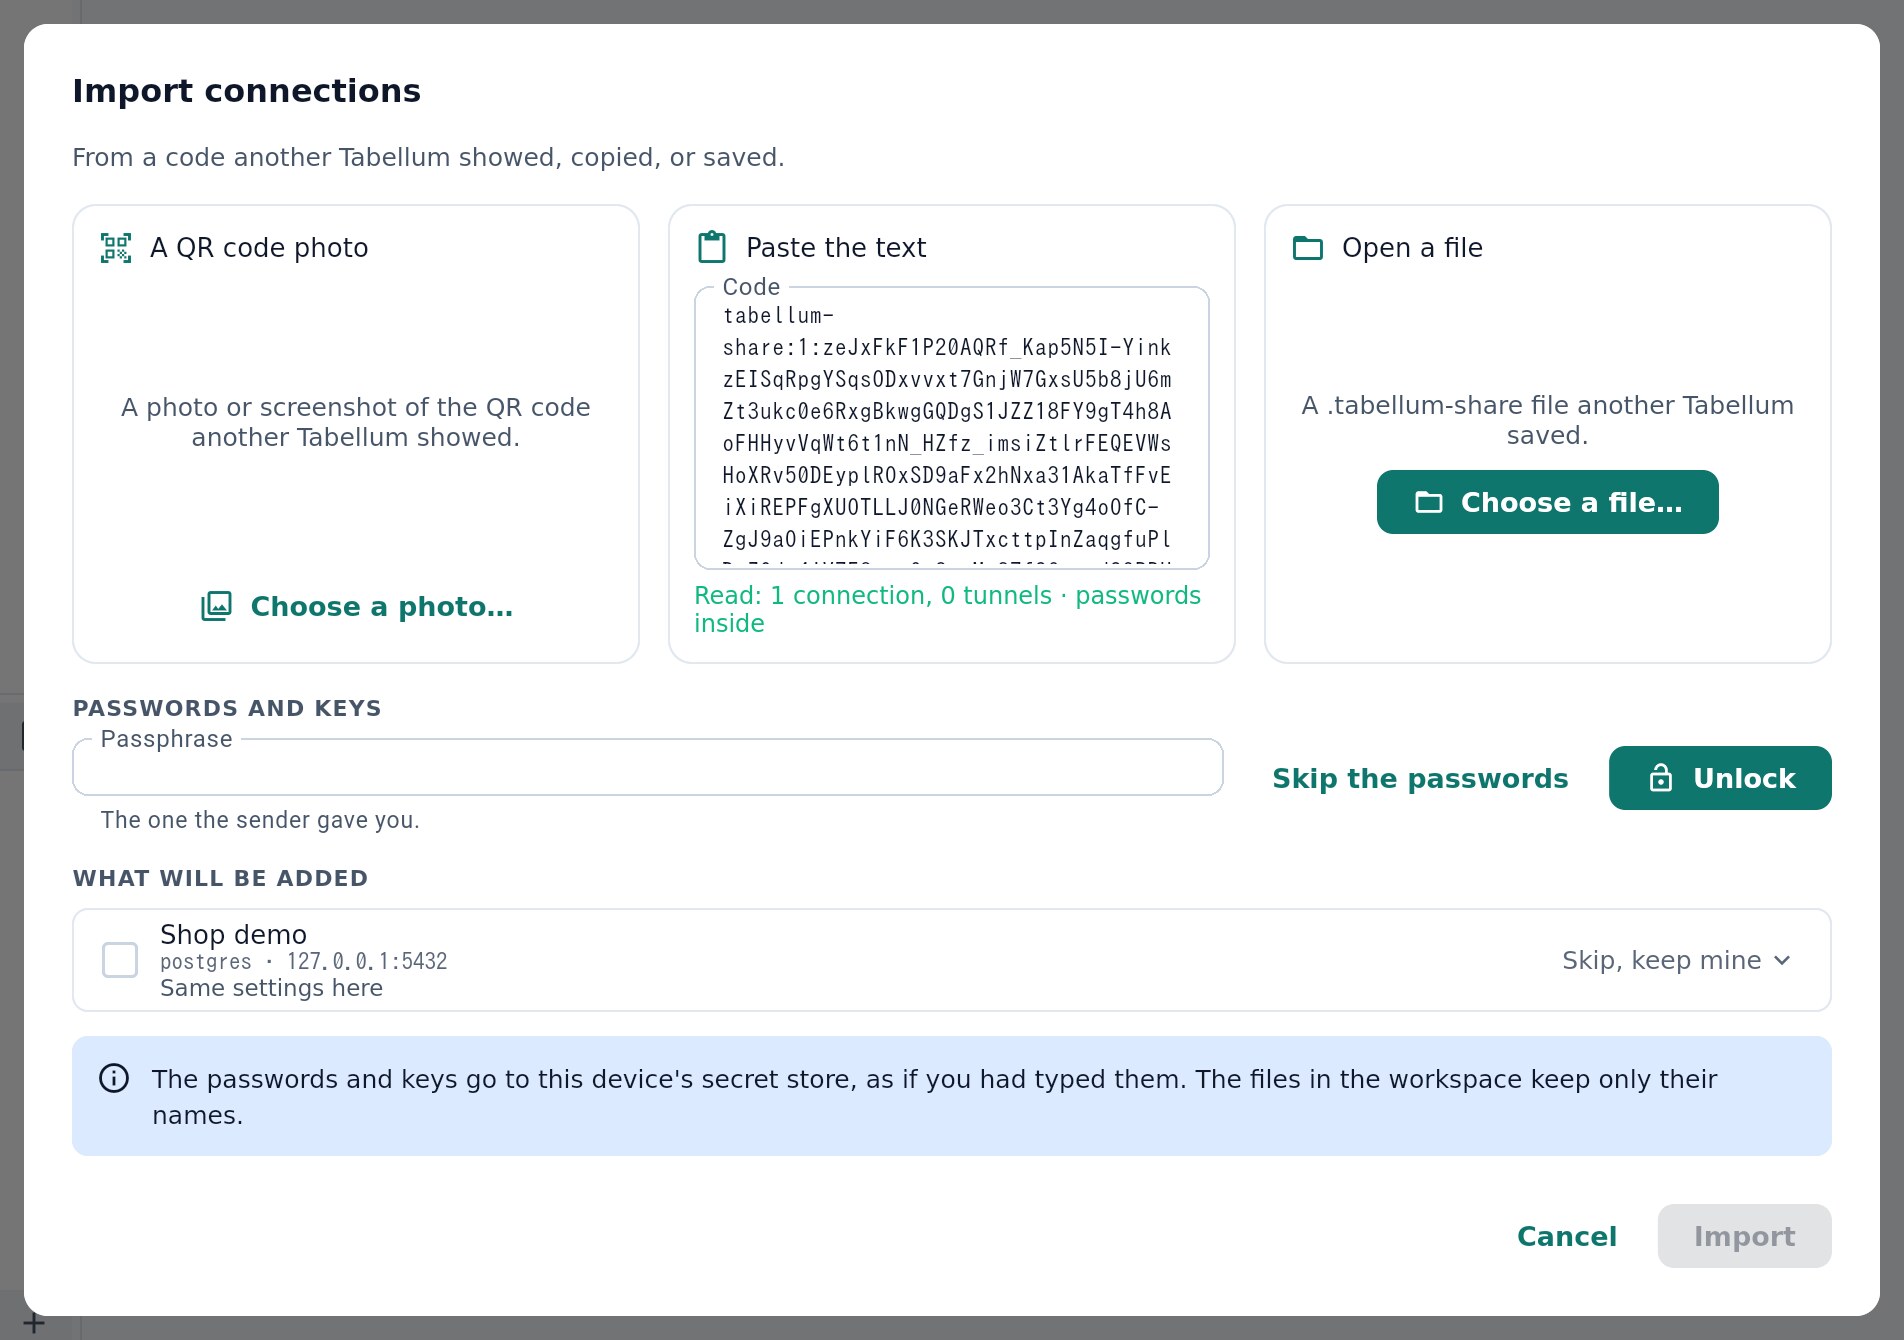
- Paste the code
- Or open the file
- Or a photo or screenshot of the QR code
- The passphrase, when the code carries passwords
- What is added, and what to do with a name taken here
Paste the code 1 or open the file 2. The first panel reads the QR code: hold it up to the camera on a Mac, or choose a photo or screenshot of it 5. If the code carries passwords, type the passphrase 3 and choose Unlock, or Skip the passwords to type them later. The list 4 shows what will be added. When a connection or tunnel of that name is already here, choose Import as a copy, Replace mine or Skip, keep mine nothing is written until Import.